Peeling is a challenging activity that aids young children’s developing muscle strength. The repetitive action of peeling helps them gain control over their fine motor skills and also draws them into bouts of focus and concentration. Peeling not only engages their tiny fingers but also their mind in a constructive activity whilst building judgement and coordination.
Who is this for?
I would begin around 2.5 – 3 years depending on the fine motor skill of the child.
Things Required
- 1 medium sized cucumber/carrot
- 1 cutting board
- 1 sturdy and small peeler (I prefer Y peelers)
- 1 medium sized bowl for peels
Preparation
I have observed that children have a better latch over the peel when the edges of the vegetable are cut. This can be done by the adult while the child watches. I also prefer not to hold and guide the child’s hand while they are peeling. This gives adults complete control but a very false sense of ‘peeling’ to the eager child. If you find that you are anxious, increase the challenge gradually by having them collaborate in the process. Also, refrain from telling them how to peel because this shifts attention from peeling to talking. Instead, just show them how it is done and have them repeat after you.
As always, you are the best judge of what works well for your child in your kitchen!
Illustrated Guide
I like to begin with an invitation, “Let me show you how to peel a cucumber today.” Introduce everything at the table, else tell the child what is required and gather them together.

Let the child smell, feel and touch the cucumber. Wash the vegetable at the sink and discard the edges.
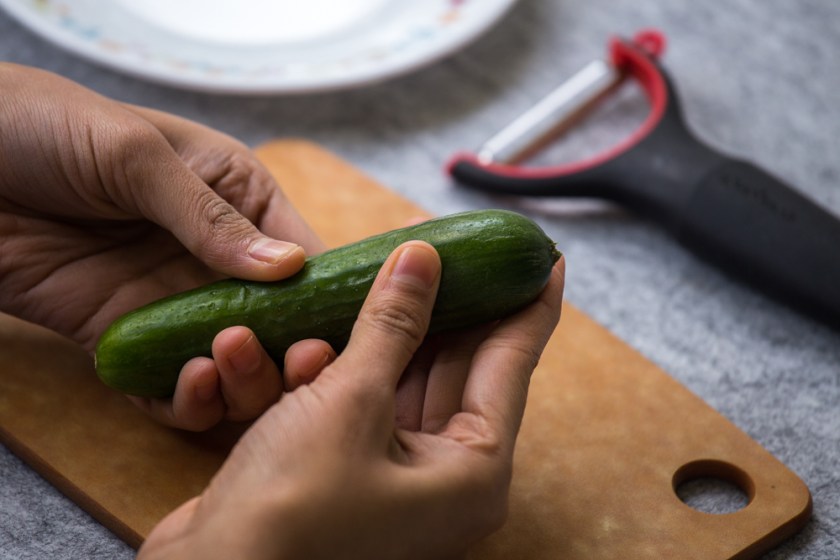
Show the child the peeler. Point to the blade and mention that it is sharp and used only for peeling the vegetable.

Hold the cucumber down using your non-dominant hand to give support and hold the peeler using full support of your palm and fingers. This gives children better support when they repeat after.

Begin at one end of the cucumber and point to the blade touching the peel.

Exaggerate applying pressure and glide from end to end, pausing in between to watch the peel come off.

Place the peeler down and pick up the peel and place it in the bowl for peels. It is nice to point to the color difference where the peel is removed and touch and feel the cucumber.

Rotate around and continue peeling. Let the child peel however they can. You can offer to hold the cucumber for support.

Once the cucumber has been peeled, the peels can be put in compost. Guide the child to put the other items away or for wash.
Short Guide
- I like to begin with an invitation, “Let me show you how to peel a cucumber today.”
- Introduce everything at the table, else tell the child what is required and gather them together.
- Let the child smell, feel and touch the cucumber.
- Wash the vegetable at the sink and discard the edges.
- Show the child the peeler. Point to the blade and mention that it is sharp and used only for peeling the vegetable.
- Hold the cucumber down using your non-dominant hand to give support and hold the peeler using full support of your palm and fingers. This gives children better support when they repeat after.
- Begin at one end of the cucumber and point to the blade touching the peel.
- Exaggerate applying pressure and glide from end to end, pausing in between to watch the peel come off.
- Place the peeler down and pick up the peel and place it in the bowl for peels.
- It is nice to point to the color difference where the peel is removed and touch and feel the cucumber.
- Rotate around and continue peeling.
- Let the child peel however they can. You can offer to hold the cucumber for support.
- Once the cucumber has been peeled, the peels can be put in compost.
- Guide the child to put the other items away or for wash.
Note : You can also cut the cucumber in half to prevent it from rolling. I have used Persian Cucumbers. Use whatever is locally available.